Using AWS CloudFront to serve an SPA hosted on S3
My previous post explained how AWS S3 could to be configured to host a static website. However, AWS S3 static website hosting might not provide all the necessary options required by modern Single-Page Applications, nor the flexibility to handle custom domains or SSL certificates. This blog post will demonstrate how AWS CloudFront can sit on top (or in front) of AWS S3 to provide a more fine-tuned web service.
It's known that AWS S3 can be setup to host static websites. This is a great capability in terms of simplicity, but it's not the main focus of S3. Keep in mind that S3 is focused on file storage and distribution. Website hosting configurations were purposely kept to a set of basic options. A default document can be configured for the root navigation, an error document can be assigned of any error occurred inside the S3 bucket and that's it in terms of configuration. On top of that, to make it all work we need to allow read-access to any (anonymous) user, meaning everybody will have read-access to all files inside our S3 bucket. If log files are stored in the same bucket, everyone will be able to see them.
Going back to Single-Page Application requirements, most SPA frameworks nowadays support HTML5 history.pushState() to change browser location without triggering a server request. This technique works perfectly if all users begin their journey from the root of our application or from '/index.html', but it fails when the user navigates directly to any other page (i.e. '/about' because 'about' is not a file present in S3). In the later scenario, the error page defined in S3 configuration will be returned. To solve this issue we need to make sure all incoming requests return our SPA entry point (usually 'index,html'), even when S3 return a 404 or 403 HTTP error. Elaborating on the previous example, requests to '/about' by default return 404 because 'about' is not a file present in S3, or 403 if the file exists and S3 denies access for any anonymous identity.
What if we want more flexibility, while keep our files stored in S3? This is where AWS CloudFront comes in to play. CloudFront provides the capability to define custom domains, setup HTTPS using your own SSL certificate or a CloudFront's default certificate (might not be very useful if you want to use a custom domain name) and redirect HTTP error codes to specific locations (this will be used to redirect everything to our SPA entry point). Obviously CloudFront provides more options like caching, allowed HTTP verbs, CDN (edge location) configurations, so on, but they are not entirely relevant to the point I'm trying to get across.
Additionally, CloudFront can also help us defining more detailed S3 bucket access. Commonly we don't want to provide direct access to S3. Ideally, all traffic must be routed through our custom domain. This way CloudFront can gather analytics for us and we will be able to define how our content can be distributed, by leveraging Edge locations (CloudFront CDN). If is done by creating an CloudFrond 'Origin Access Identity' and only allow S3 access to this principal.
The next sequence of screenshots demonstrates how CloudFront can be configured to serve an existing S3 bucket.
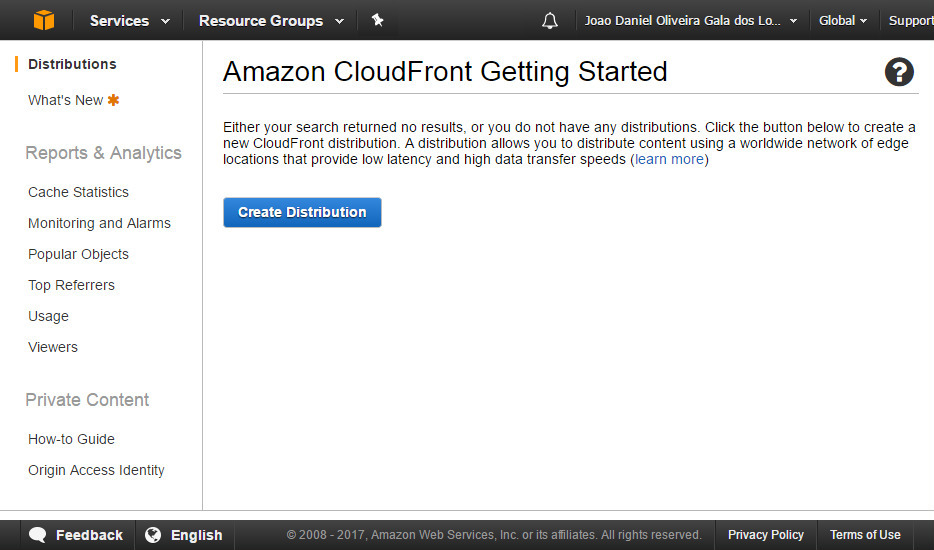
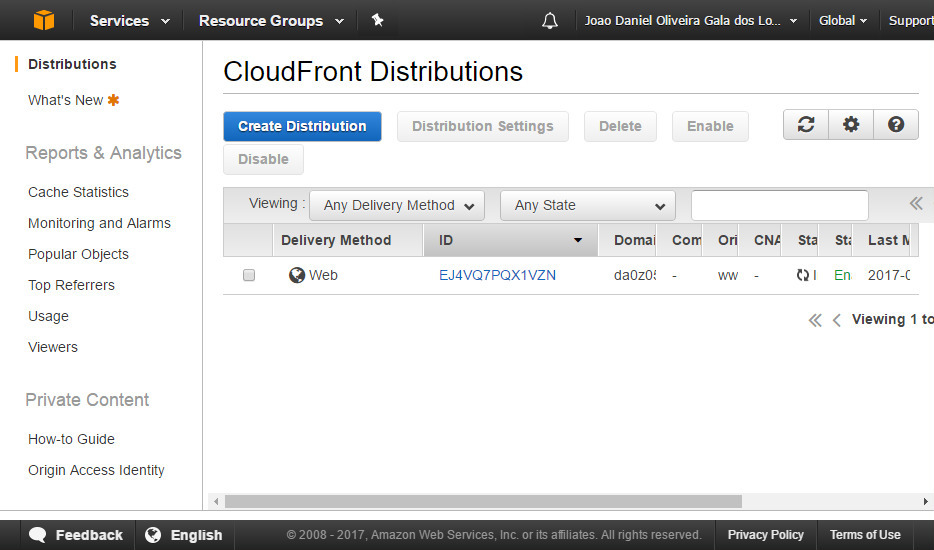
From AWS CloudFront, select 'Distributions' and click 'Create Distribution'
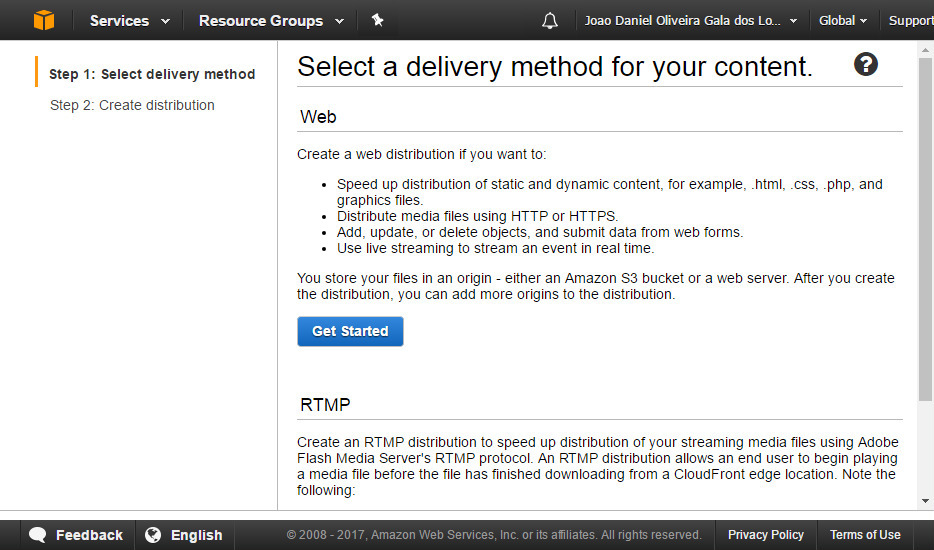
Click 'Get Start' from the Web delivery method section
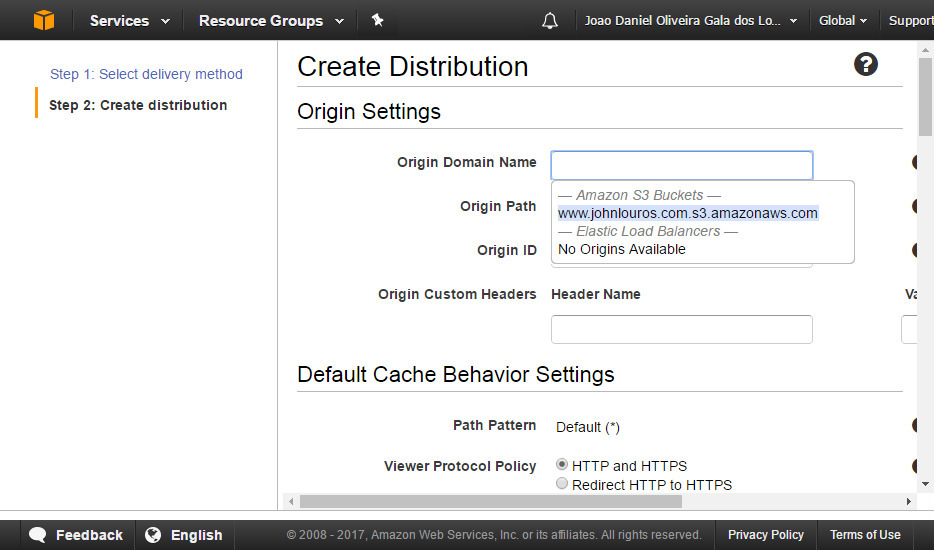
Set the S3 bucket you want to be serve and which folder shall be the root (leave blank for everything)
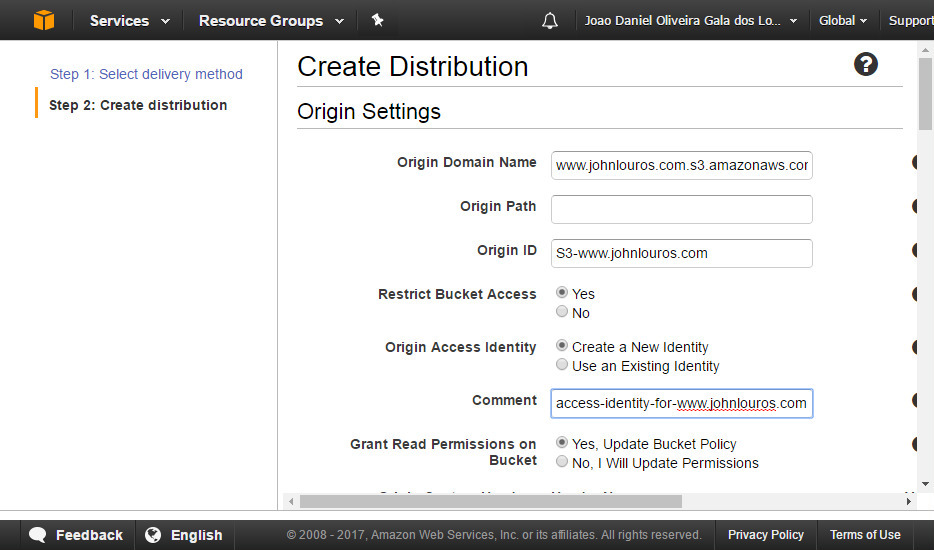
Select 'Restrict Bucket Access' and either create a new Origin Access Identity. If preferred also select to update S3 bucket policy (but you can do this manually later on). Save this configuration.
Verify the newly created Origin Access Identity (navigation from the left panel)
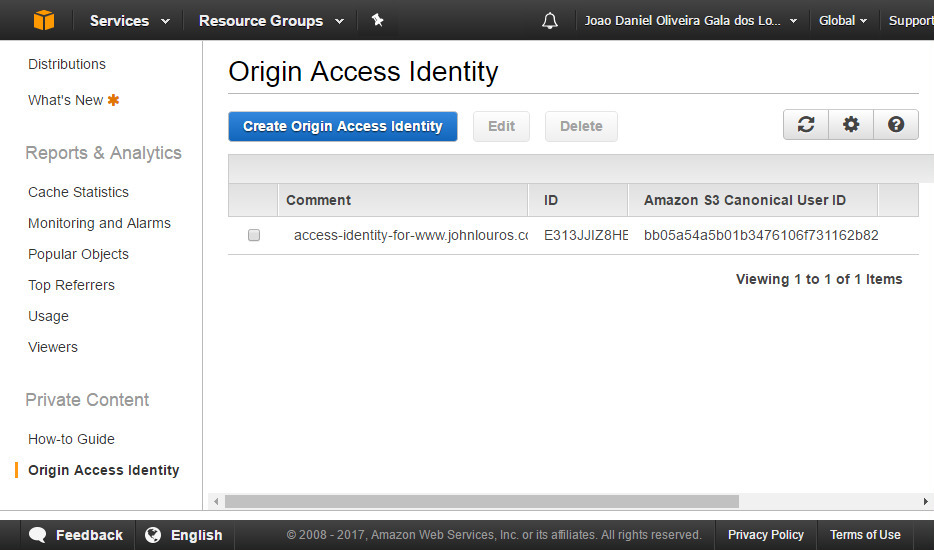
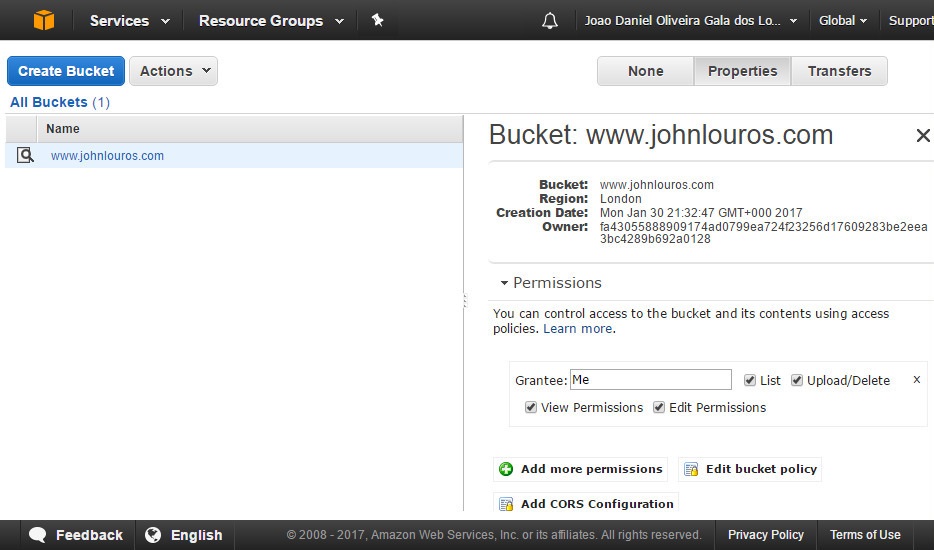
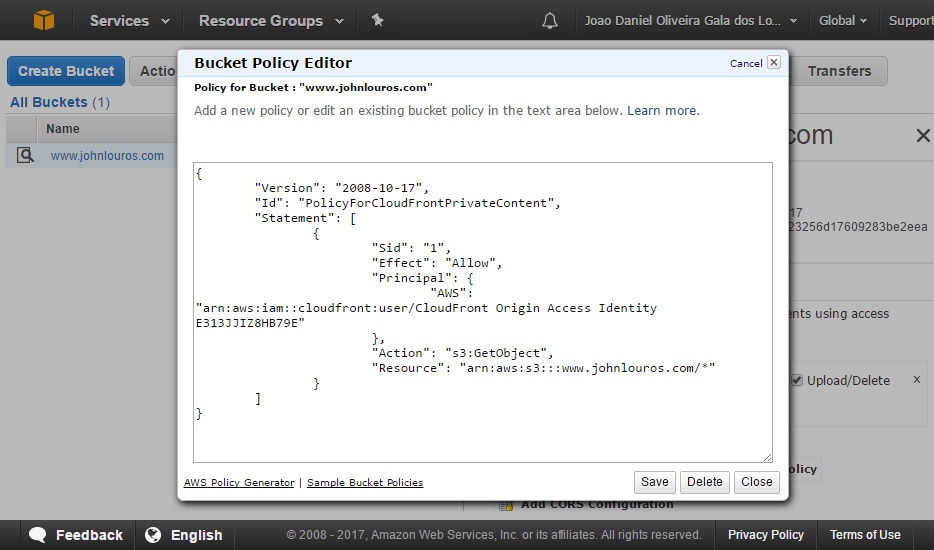
Navigate to your S3 bucket and click 'Edit bucket policy'
Ensure that only the Origin Access Identity associated with your distribution has access to your S3 bucket
Navigate back to CloudFront and select the distribution previously created.
Select 'Error Pages' tab and click 'Create Custom Error Response'
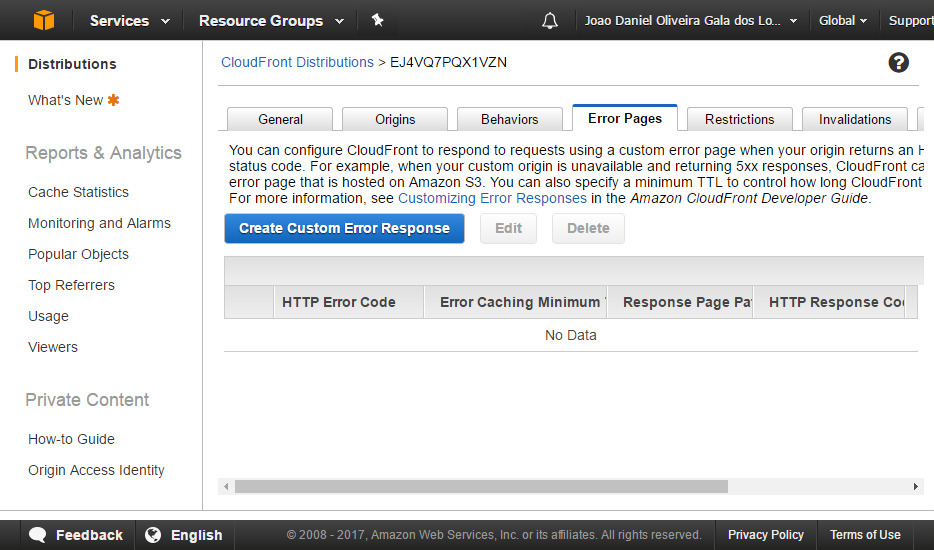
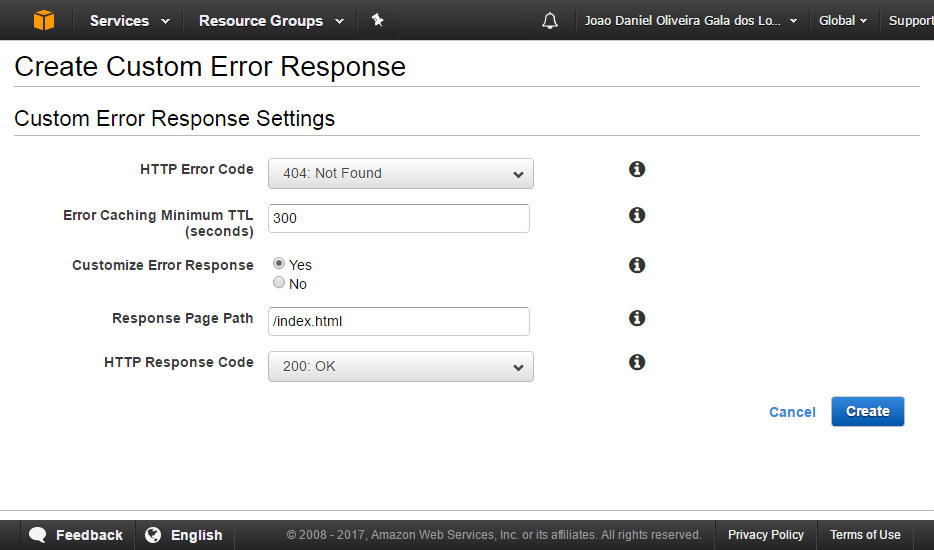
Create two custom error responses: 404 and 403, return '/index.html' and a 200 response code.
Now you just need to wait for CloudFront finish provision (usually takes 20 minutes) and your all set. Your SPA should work without a problem.