Creating a Chrome extension using Visual Studio Code
With the announcement of Visual Studio Code last week, I thought the best way to try it out was to write a small tutorial. In this post, I'm going to describe how to create a simple Google Chrome extension, that generates a QR code for the currently opened browser tab. Then, any extension user can scan the code and view the opened website on his mobile device. As expected, for this tutorial, I am going to use Visual Studio Code.
Before we start, ensure that you have Visual Studio Code installed on your machine, I am using version 0.1.0 (first release after //Build 2015/); and Google Chrome, for this tutorial I am using version 42.0.2311.135. For this tutorial I will be using Windows 10, but both products work on Linux and Mac OS, so feel free to use whatever you like.
If you are not familiar with Chrome extensions, don't worry, anyone can describe them as an web applications that extend Google Chrome base functionalities. If you already know HTML, CSS and JavaScript this will be piece of cake.
Let's start by creating the necessary folder structure. Create a new folder called "QR generator for Chrome", the image below shows how to do it with PowerShell, but you can do it with Explorer, Finder, Shell, or any other way you prefer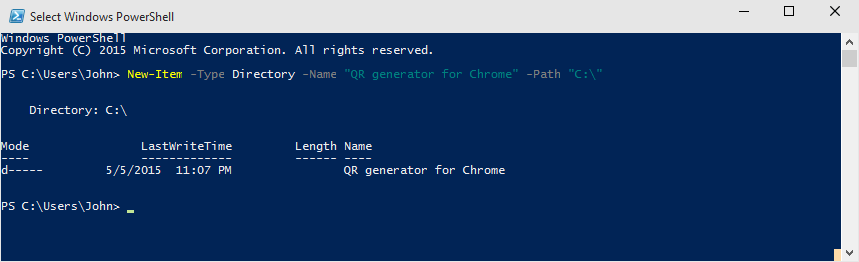
Open up Visual Studio Code. We want to work on our recently created folder, so go to "File" -> "Open Folder..." or use [Alt] + [F]; [F] and select our "QR generator for Chrome" folder. This will be our workspace folder.
Now that you have the VSCode pointing to your workspace folder, create a new folder called "app". This folder will contain all the code necessary for our extension. 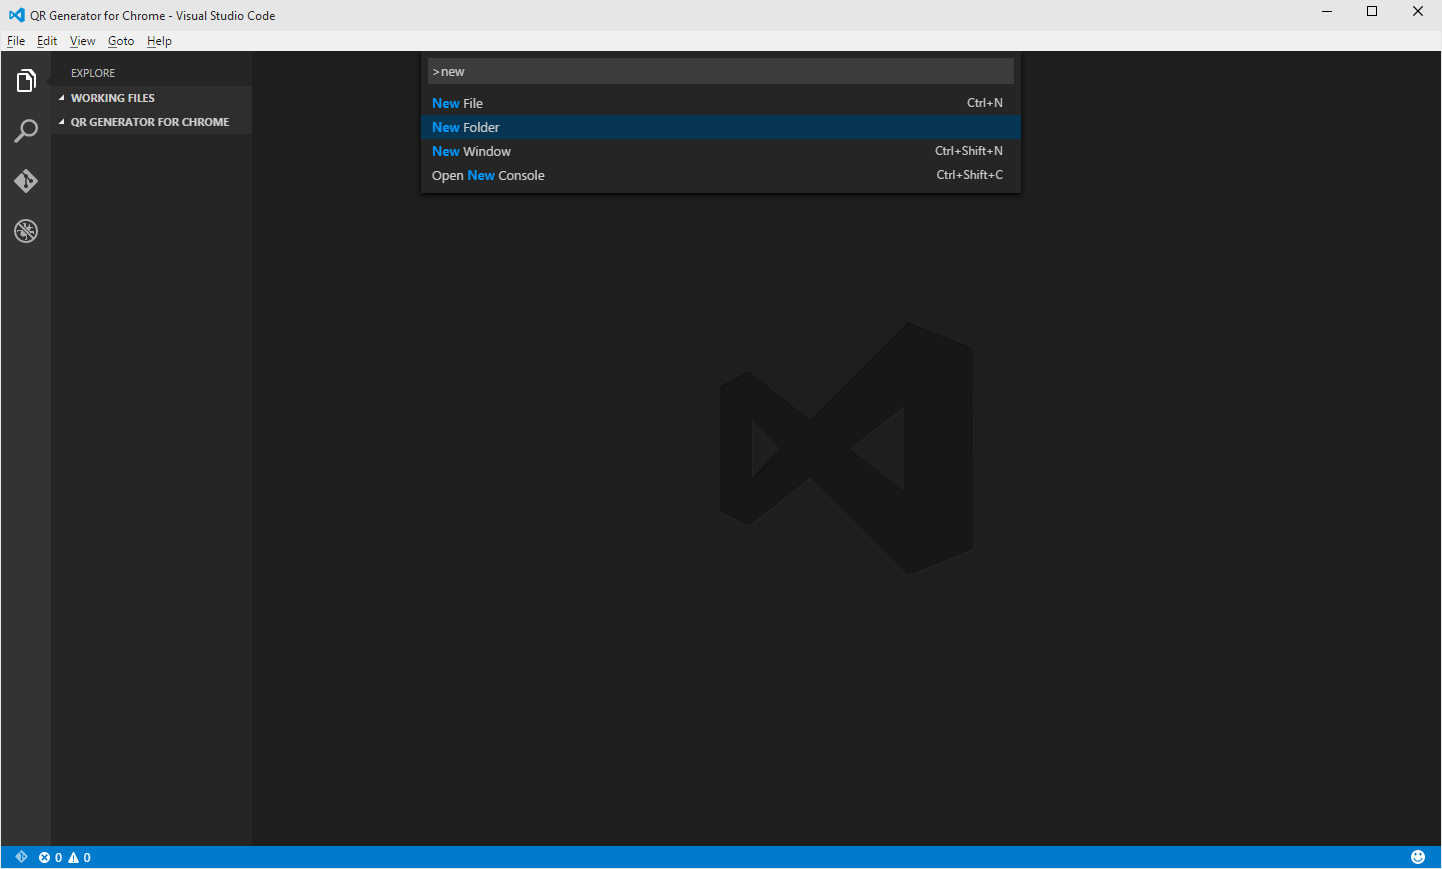
Any Chrome extension requires a JSON manifest file upon the developer defines a common set of extension properties like: name, version, permissions, icon, so on. So let's create a new file called "manifest.json". 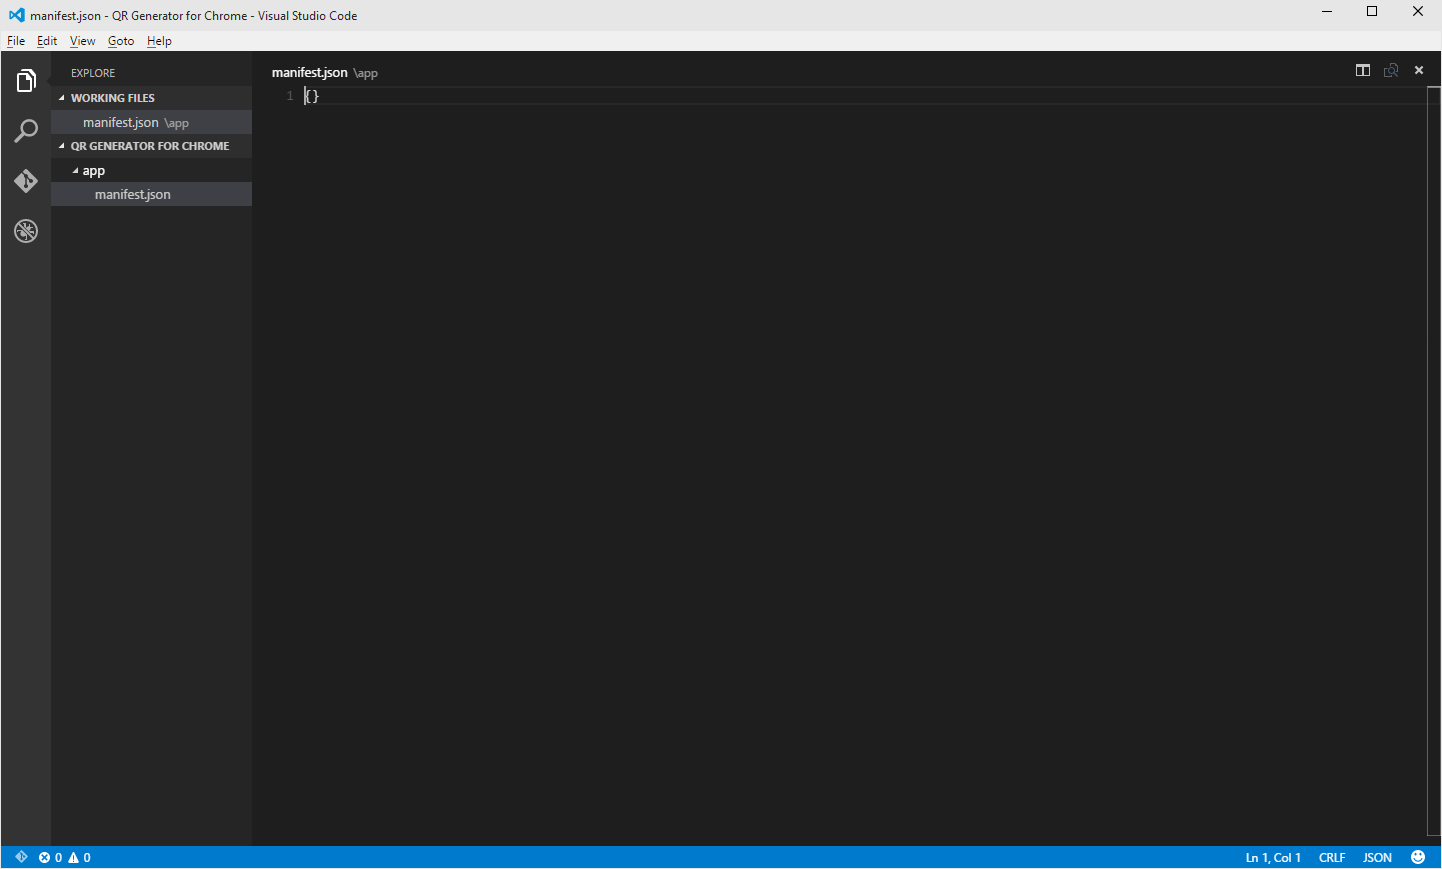
However, we don't know anything about Chrome extension manifest files. Wouldn't be helpful if we had some kind of auto-complete and validation? The good news is somebody already thought about this. We can add a JSON schema file to enable auto-complete and validation for Chrome extensions manifest files. Go to http://schemastore.org/json/ and locate the JSON schema file for Chrome extension manifest http://json.schemastore.org/chrome-manifest 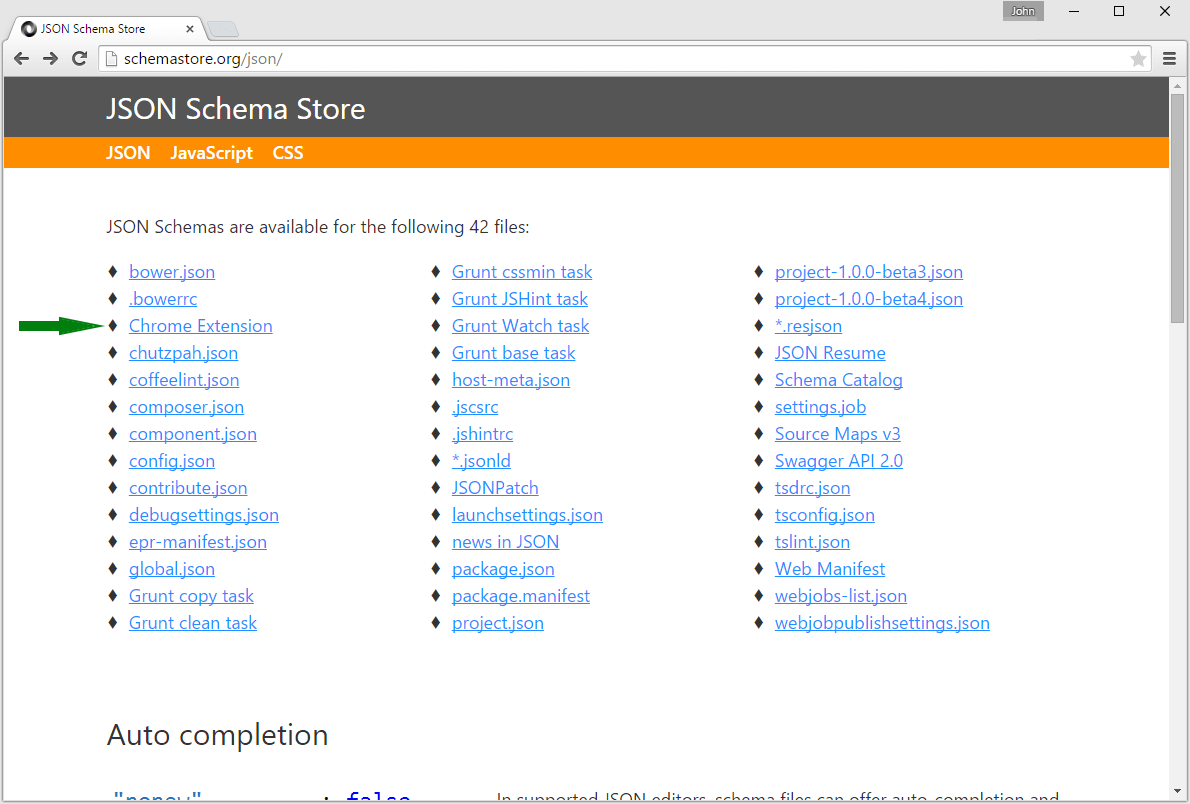
To associate this schema with manifest.json files, let's open Visual Studio Code workspace settings. Open the "command palette..." using [Ctrl] + [Shift] + [P]; type "settings" and select "Preferences: Open Workspace Settings". 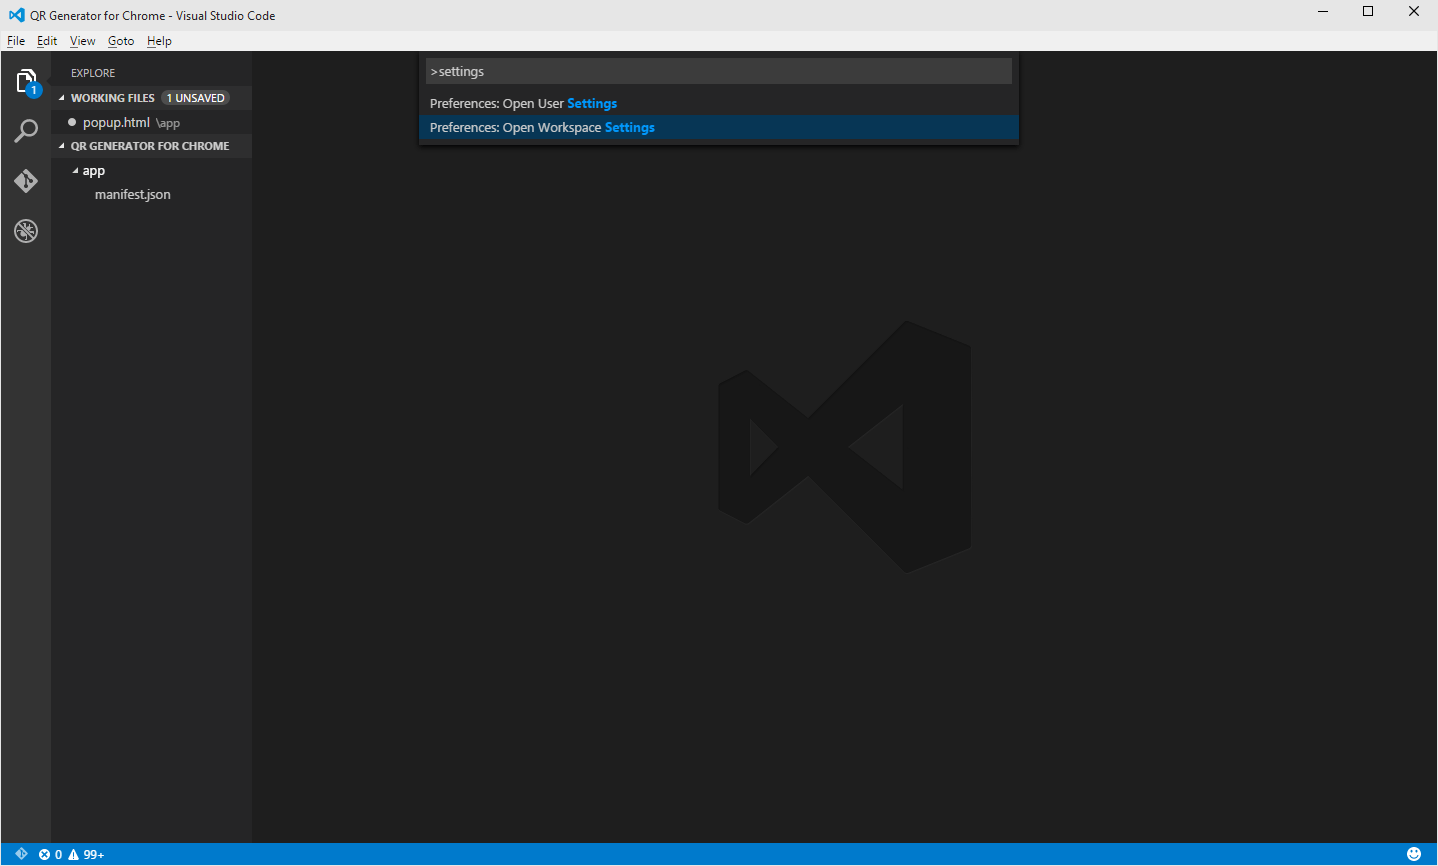
On the left panel you can view the default settings. Those we can't override here (and we don't want to). On the right side we have our own "settings.json" which overrides any of the default settings, on this workspace (this are project settings not global settings). On the "settings.json", type "json.", wait for the auto-complete and select "json.schemas". 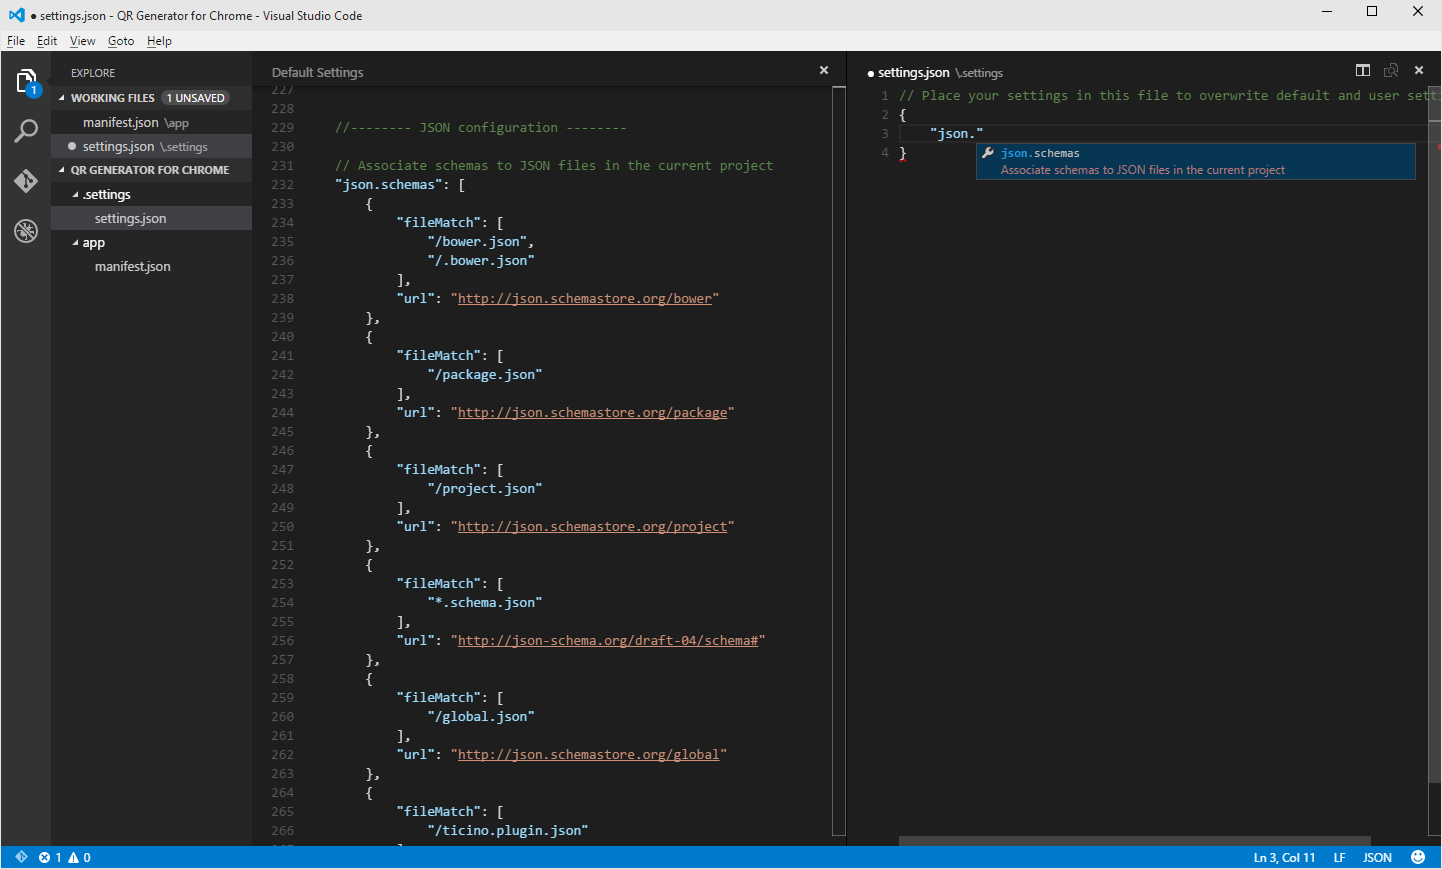
This will copy the entire "json.schemas" section of the default settings. Now you can add, remove and modify whatever you want. For this workspace, just add a reference to http://json.schemastore.org/chrome-manifest for any files that matches "manifest.json". Once you save this changes, Visual Studio Code will create a new file at the root of the project ".settings/settings.json" upon any workspace settings are stored. 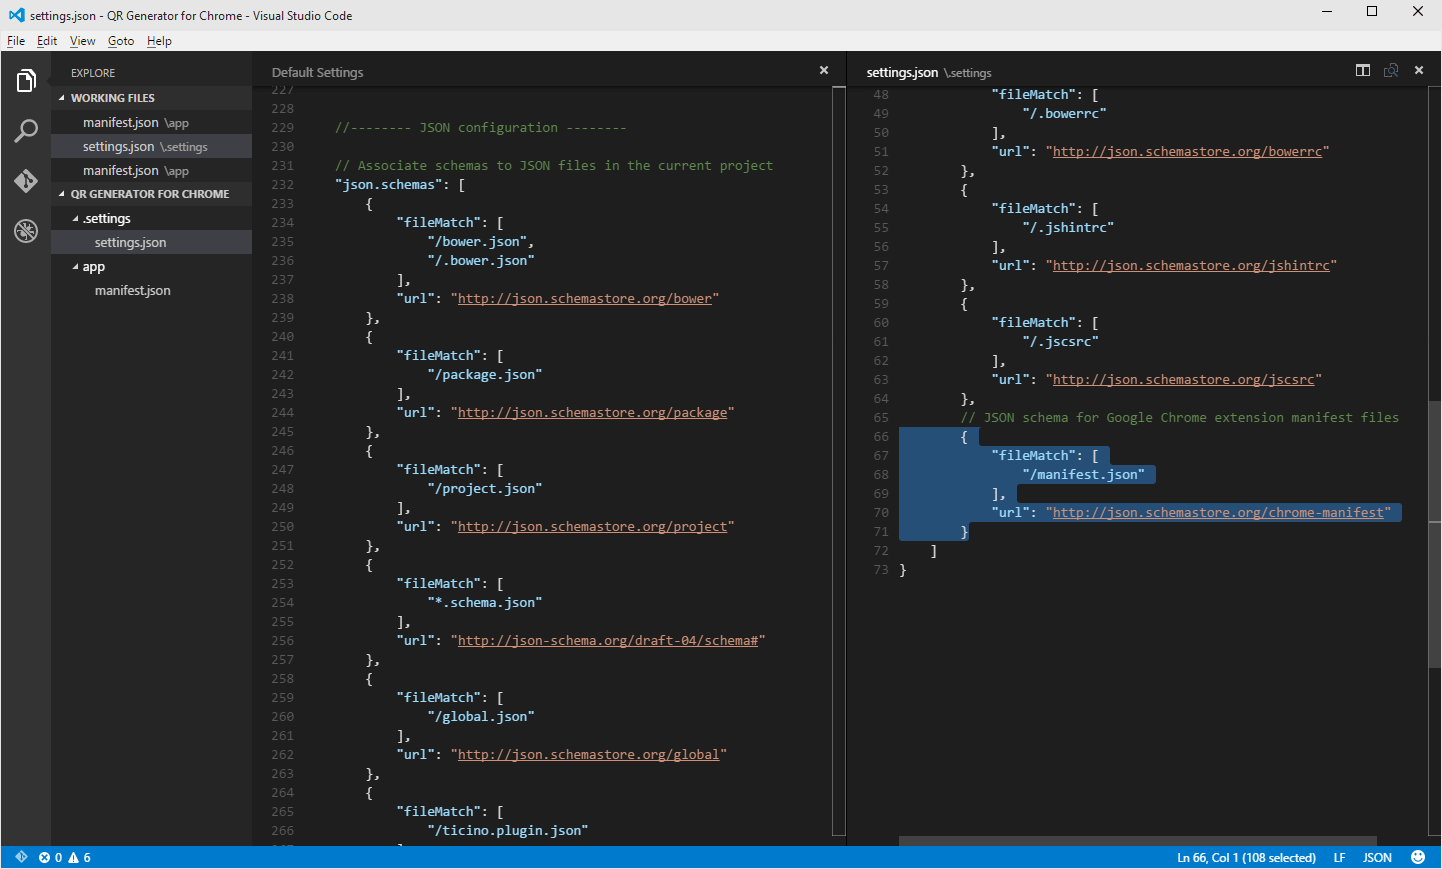
Let's get back to our manifest file to define the base settings for our extensions. The screenshot below highlights what we want to define, but besides of the self-describing properties (like name, description and version), let's talk about "permissions" and "browser_action". Since we want to generate a QR code for the current tab, we need to ask Chrome about the active tab Url. To do that, we have to ask permission to access it. Just add "activeTab" to the "permissions" array to enable it. On the "browser_action" section, you will define the extension icon, title and default popup. "default_popup" is your "index.html" or the main page, and since the extension will be displayed as a popup, I think the name is definitely appropriate. For now, just create a simple (and valid) HTML file with "Hello world" and create a 19x19 png file for your icon.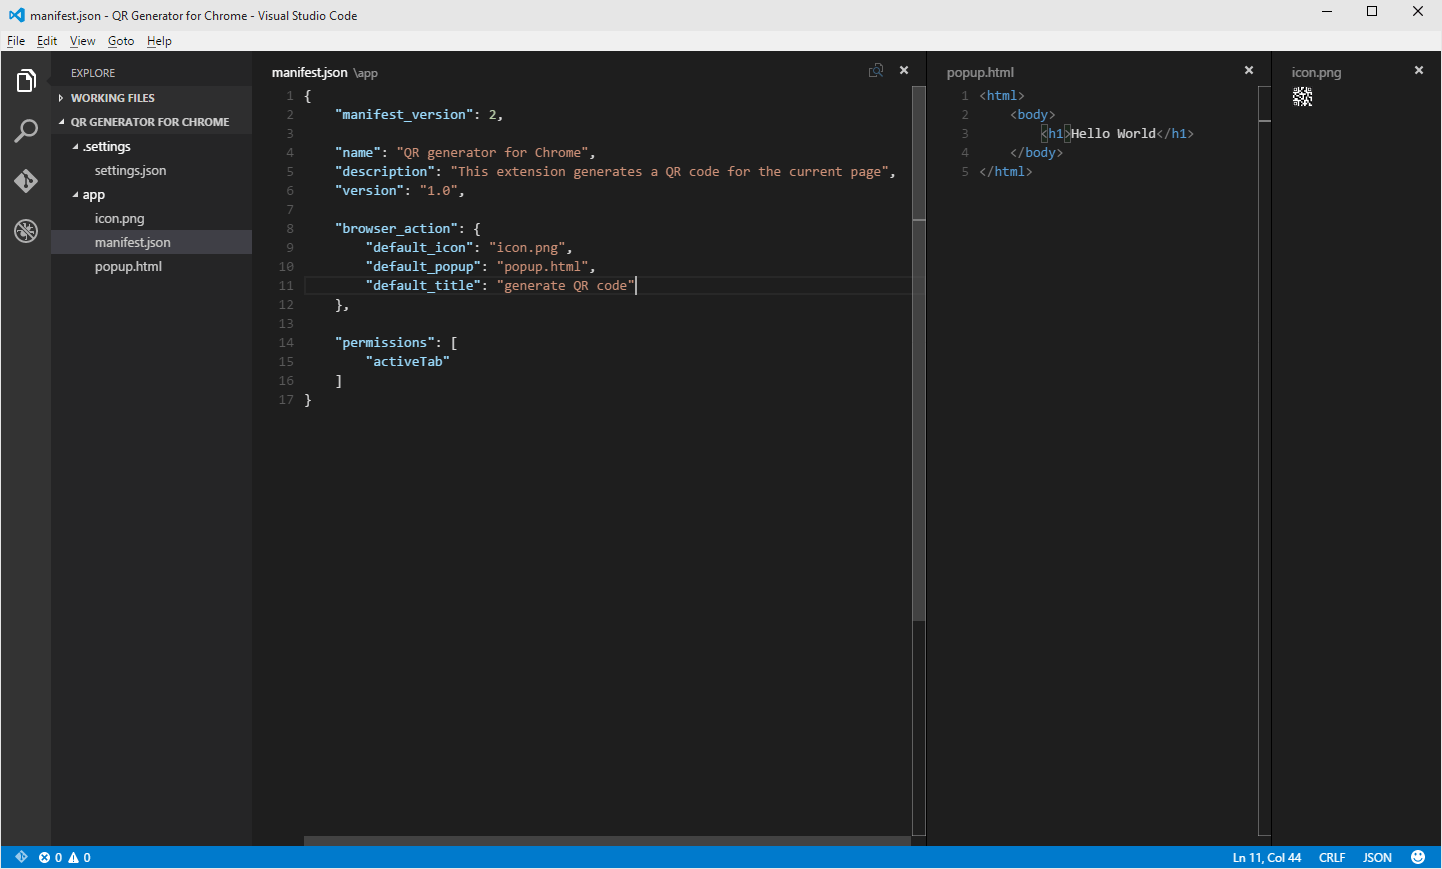
To test your extension locally, open Google Chrome and type "chrome://extensions" on the address bar; enable "Developer mode" by clicking on check-box on the top right corner; next click on "Load unpacked extension..." and select "app" folder located inside your project, ex. "C:\QR generator for Chrome\app". Now, you should be able to see your Chrome extension in top right corner of chromes, right beside the "hamburger button". 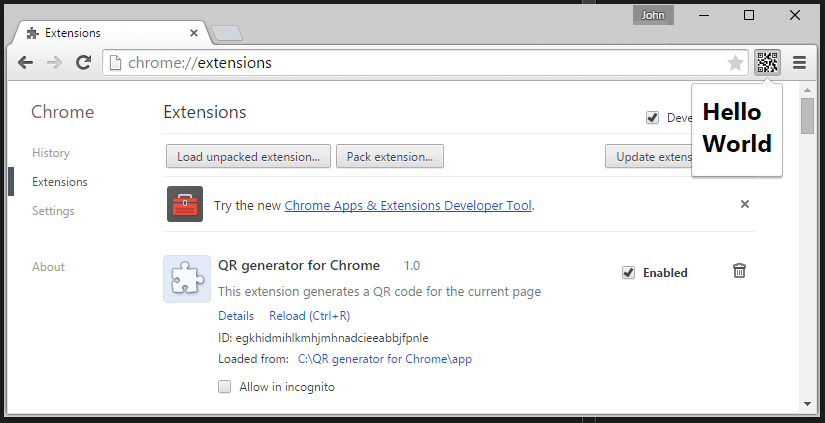
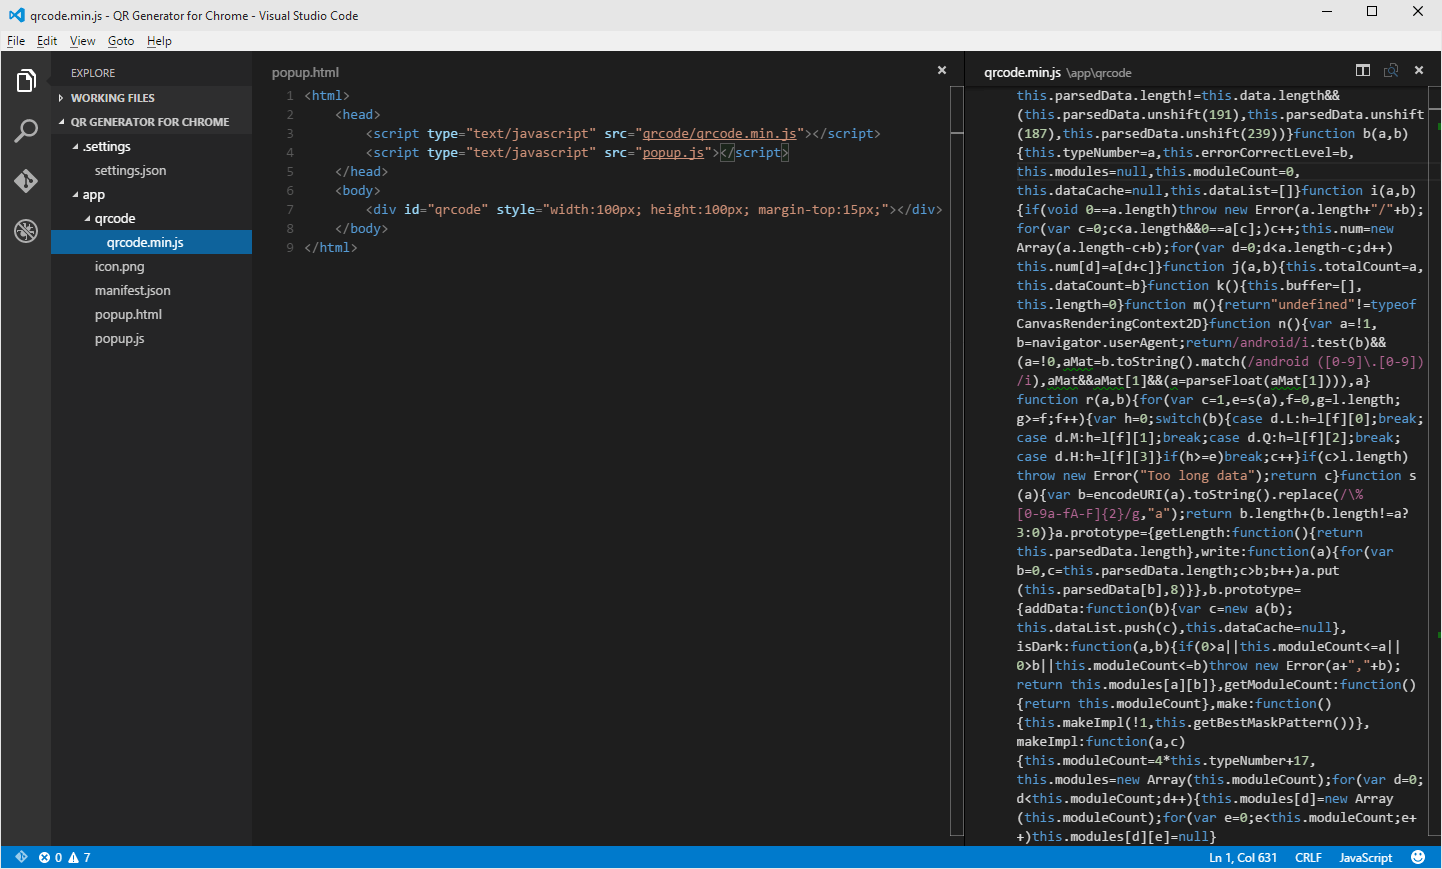
Now that you got the basics of creating a chrome extension, let's take care of the QR code generator. Since there's plenty of open-source implementations of QR code generators, written in JavaScript, let's pick one from GitHub. I found a very nice project from Shim Sangmin called qrcodejs. You can check it out at http://davidshimjs.github.io/qrcodejs/. We will only need the minified version of his QRCode solution, so download it and add it to your project inside a folder called "qrcode". We will also need to create a JavaScript file, where we will write the code, to handle: the event when the user opens up the extension; the request to get the current tab Url and finally, to call the code to generate the QR code. Just create a new JavaScript file called "popup.js". This is all the JavaScript files we need. Now we need to reference them in your HTML file. Additionally, we need a placeholder for the QR code, so on the HTML body create a "div", set the id to "qrcode" and the style to 100px with, 100px height (margin-top is optional).
As mentioned before, our JavaScript file will have to handle a particular set of events to make everything work. First, when the use opens up the extension (in our case when the DOM content is loaded), we will need to ask Chrome what's the current tab Url (using the getCurrentTabUrl function). Once Chrome replies back, we will call the QRCode library to generate a QR code for the given Url; we also tell in what DOM element the QR code should be placed. I tried to comment the "popup.js" the best I could, for the space I had available. 
And here's the final result (I'm using this blog as example) 
You can find the source code for this project on GitHub. It's under MIT license so feel free to use it as you like it.